Free GitHub blog and Hosting with Jekyll
Build 'username.github.io' for free with GitHub account

Nowadays, thousands of developers using GitHub blog with their username. It’s free, fast and custom-friendly. With Jekyll and GitHub account, You can get your own domain and blog right now without professional knowledge.
Install Git Bash
Before install, just make sure few development environment installed correctly like GitHub account, Ruby, Node.js, Git Bash(I’m Windows user so I installed Git Bash). You can download Git Bash HERE.

Create a new repository
Next, you have to create a new repository on your GitHub account, with your own username on GitHub, like username.github.io. My username on GitHub is spemer. So I created a new repository like below.

Clone into your local storage
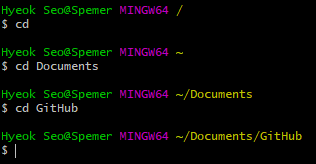
Now you have to clone your repository on GitHub into your local storage by Git Bash we installed before. Approach to your local GitHub directory with some command lines. The image below is example of mine.

When you’re in your local directory on Git Bash, you can setup your repository into your local directory. You can see the screen like below, after you create a new repository on GitHub.

Copy your 'HTTPS' url, and paste it on Git Bash with command line like below.
$ git clone https://github.com/spemer/spemer.github.io.git

You can check your directory with command ‘ls’ in your current directory, like I did on the image above.

Install Jekyll
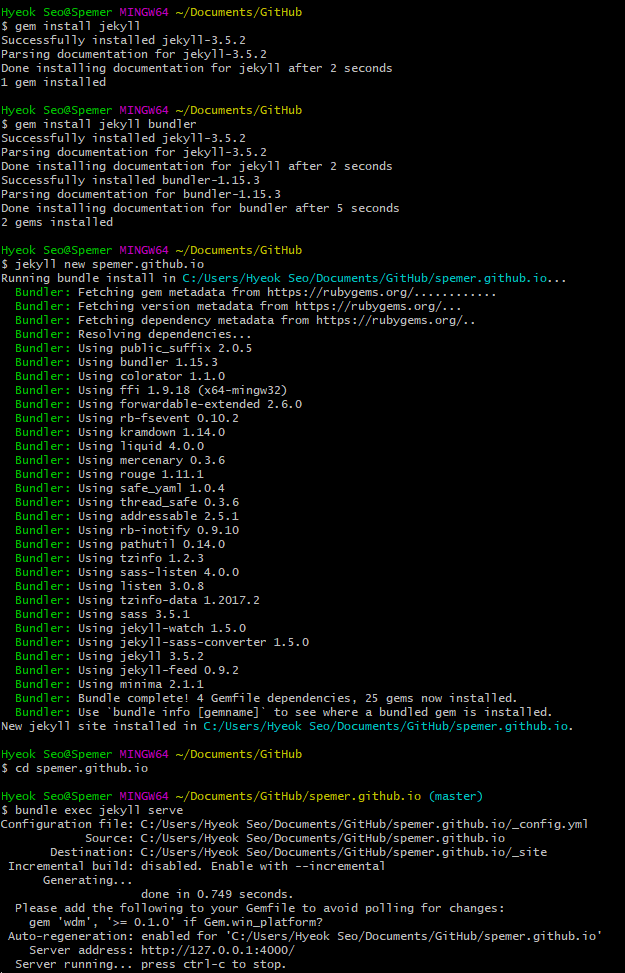
From now on, it’s pretty simple to install Jekyll into your local username.github.io directory. Approach into your username.github.io directory with command lines, and Simply copy and paste some command lines below on Git Bash.
$ gem install jekyll
$ gem install jekyll bundler
$ jekyll new {username.github.io}
$ cd {username.github.io}
~/username.github.io $ bundle exec jekyll serve

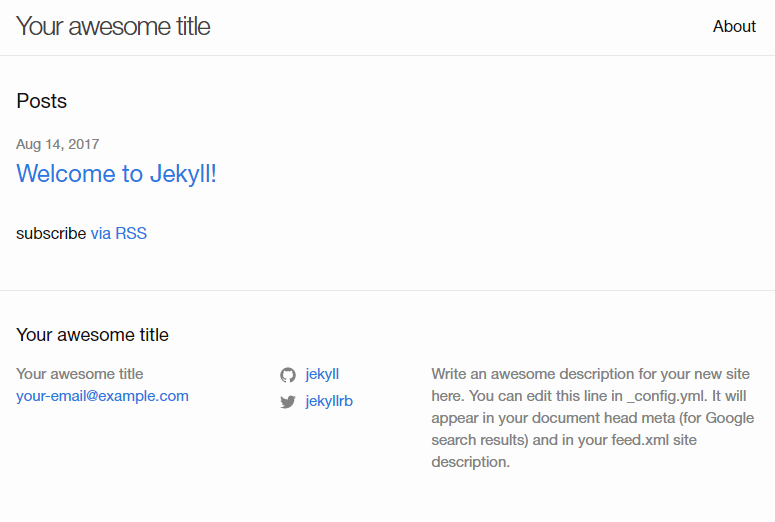
If there are no problem like the image above, You’re good to test your GitHub blog on http://localhost:4000/

To stop the server, just press ‘ctrl + c’on Git Bash.
Initial Commit
Now you can browse your GitHub blog! You can publish your blog by simply commit and push your files from local directory to GitHub repository. You can do that also with Git Bash, just copy and paste the command lines below.
$ git add .
$ git commit -m "Your commit message"
$ git push

Go to your GitHub repository, and check your first commit.

Check Your Domain
If your commit was successful, go straight to your domain with your username! It’s like username.github.io as I told you before, or you can check mine instead.
Customization
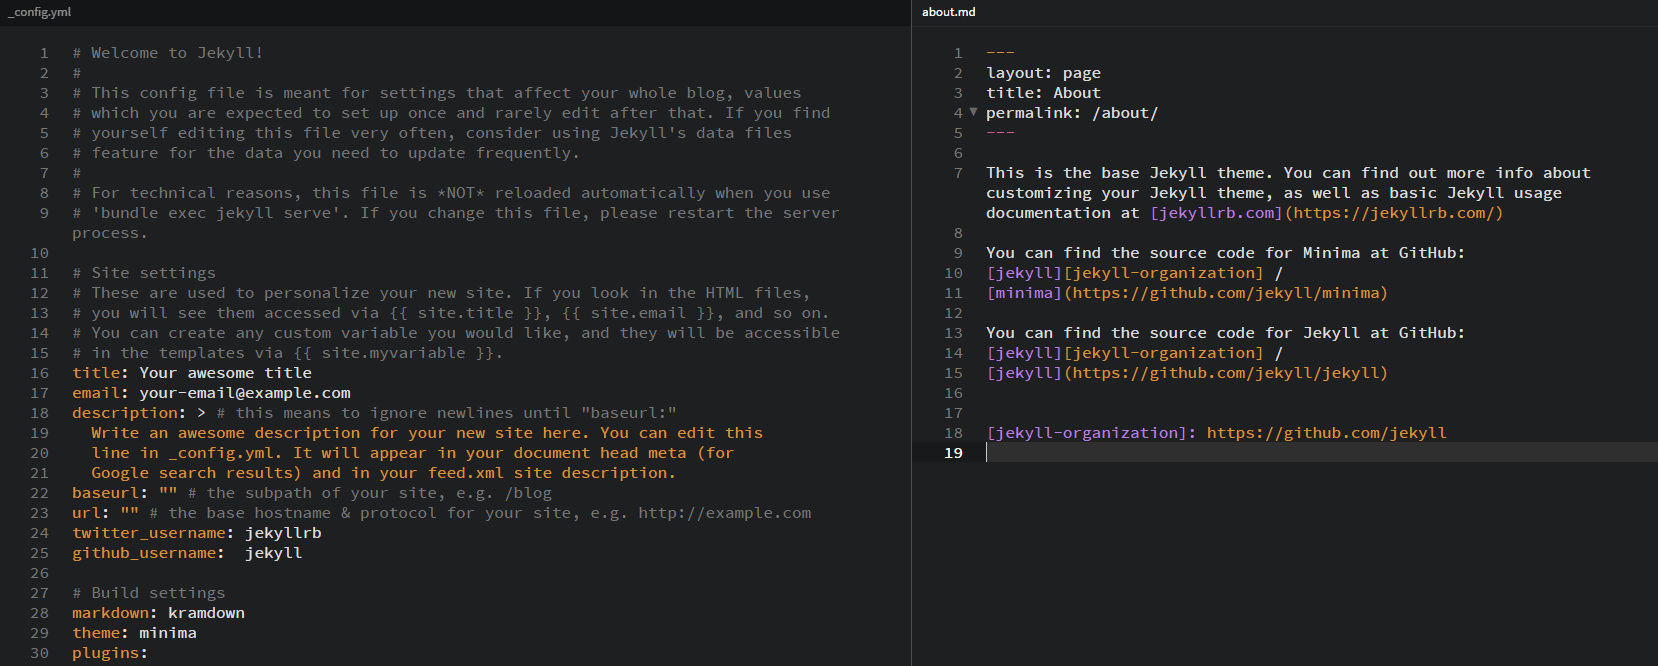
Now you can customize your GitHub blog with markdown files. With your '_config.yml' on your directory, you can set up your blog’s settings. And you can customize other sites like 'about.md' with Markdown. You can read the detailed docs HERE. You can also download cool Jekyll Themes on http://jekyllthemes.org/ too!

Thanks for reading my article. If you want to contact me, visit my LinkedIn or just send me an Email to ghsspower@naver.com. Hope you enjoyed my article!
Title : Free GitHub blog and Hosting with Jekyll
Date : August 14, 2017
Writer : Hyouk Seo (Spemer)